


|
|
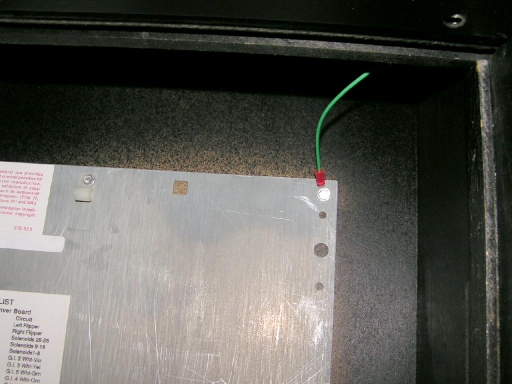
Metal Speaker Panel Speaker ReplacementSafety tip: Be sure to disconnect the power to the game before performing any work! In order to replace the speakers the speaker panel must be removed from the game. Hint: In the sections below you'll need to find the center of a square. It's very easy to do this by drawing diagonal lines from each corner of the square to the opposite corner using a straight edge and a pencil. The point where the two lines intersect to form an "X" is the center of the square. Safety tip: Wear eye protection when using power tools! A dust mask will come in handy for the operations that generate lots of dust. Remove the Speaker PanelRemove the back glass and set it in a safe location. Open the insert panel and remove the hex-head sheet metal screw from the upper right corner of the metal panel in the back box to free the green ground wire leading to the speaker panel.
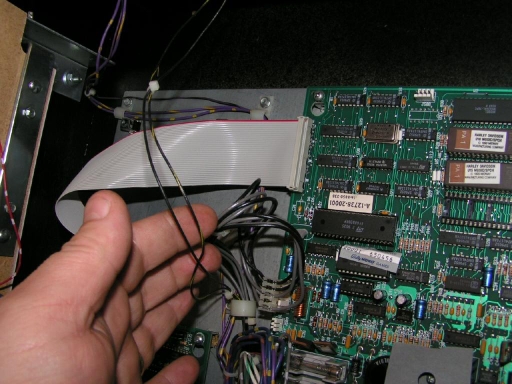
Follow the black and black-yellow wires from the left speaker into the back box to identify the specific connector on the sound board, and then remove that connector from the board (the wires run from the left rear of the metal speaker panel to a cable clamp on the left of the sound board, and then along the bottom edge of the sound board).
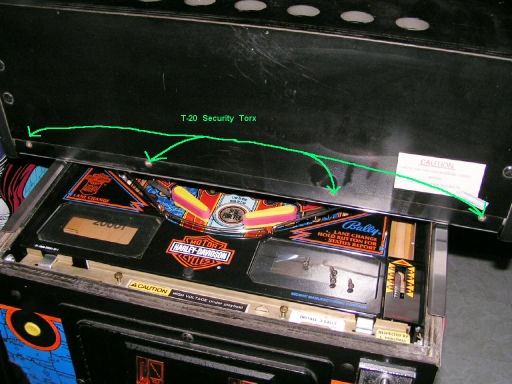
The speaker panel wiring harness will also have a single contact in-line connector that joins the speaker panel wiring harness to the cabinet speaker wiring harness; you'll need to disconnect this connector as well. The safest way to remove the metal speaker panel is to remove the two bolts that secure the back box to the main cabinet. Close the insert panel, unlock the setup latch on the rear of the back box, and then fold the back box onto the playfield rails; place a towel or other padding between the back box and the cabinet. Next, remove the four tamper-resistant Torx T-20 screws that fasten the metal speaker panel to the top of the back box.
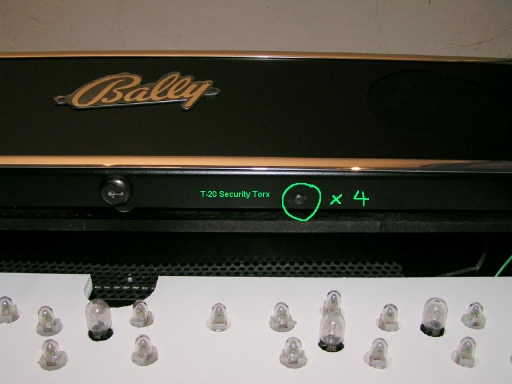
Raise the back box back to the upright position and fasten the setup latch. While holding the speaker panel in place, remove the four tamper-resistant Torx T-20 screws that fasten the panel to the wooden rail that spans the upper part of the back box. The panel assembly is heavy, so be careful that it doesn't come crashing down on the playfield glass!
Feed the speaker wiring harness through the opening in the top of the back box as you pull the speaker panel forward and remove it from the back box. You may need to open the insert panel in case the speaker wiring harness gets hung up on the other wiring harnesses inside the back box. If the speaker panel doesn't budge easily you can insert the key in the back box lock and gently pull forward on the key to dislodge the panel. Disassemble the Speaker PanelSet the speaker panel on a padded work surface. Cut the wires from the speaker wiring harness where they attach to the left speaker. You can discard this harness, as we'll be replacing it with a new one. Also cut the two wires (black and black-yellow) that run from the left speaker to the right speaker. Gilligan's Island, Harley Davidson, and Party Zone have a 6 inch speaker on the left side mounted directly to the metal speaker panel; Black Rose has a 5-1/4 inch speaker on the left side mounted to an adapter plate. The tweeter on the right side is mounted to an adapter plate. Remove the nuts that fasten the adapter plate or speaker to the metal speaker panel, and then remove the adapter plate or speaker. The speakers and adapter plates can be discarded. Check if You Will Need SpacersGrab one of your 6-1/2 inch replacement speakers and set it on the magnet end so the tweeter is facing upward. Carefully lay a flat metal ruler or straight edge across the outside edge of the speaker next to the tweeter. Measure the distance from the bottom of the ruler or straight edge to the top surface of the tweeter. If the tweeter projects any distance at all past the mounting plane you'll need to fabricate a spacer for each side of the speaker panel. If you don't need spacers skip to the section on assembling the speaker panel. Your speakers probably came with some sort of plastic spacer; you can modify those to fit the speaker panel, or you can fabricate spacers from MDF board. Fabricate SpacersThe spacers are fabricated from 1/4 or 3/8 inch thick MDF board; the thickness used depends on the front projection of the tweeter. Measure the projection of the tweeter (see above) and subtract 1/4 inch. If the remainder is less than 1/4 inch you can use 1/4 inch thick MDF board; if the remainder is more than 1/4 inch you'll need to use 3/8 inch thick MDF board. Here is a diagram of the spacer that we're going to fabricate:
Cut a piece of MDF board 6-1/2 inches square. A table saw is the best tool for this job; if you don't have a table saw you can use a portable circular saw. You can also have your local lumber dealer cut some pieces of MDF board to size for you. MDF board is relatively inexpensive, and it usually costs an extra quarter or fifty cents per cut for the lumber dealer to cut the MDF board to size. Draw diagonal lines from each corner of the board to its opposite corner; the point where the two lines intersect to form an "X" is the center of the board. Make marks on each diagonal line 3-1/16 inch from the center of the square (four marks total). The screws that mount the speaker to the display panel will pass through holes at these points. Use a compass to mark a 6-1/2 inch diameter circle centered on the board; we will trim the spacer along this line later. If you're using a circle cutter adjust it to cut a 5-5/8 inch diameter circle. Be sure to securely clamp the MDF board to the table of the drill press before starting the drill press! Position the pilot bit where the two diagonal lines intersect and slowly advance the circle cutter until it has cut through the entire thickness of the board. Stop as soon as the cutout section of MDF board starts to spin around with the circle cutter bit. Note: You may want to use a 1/4 inch brad-point drill bit to make a pilot hole before using the circle cutter; the pilot bit on the circle cutter is a standard drill bit that is a little tough to align exactly even with the center lines on the template. If you're using a jig or sabre saw, use a compass to mark a 5-5/8 inch diameter circle centered on the board. Drill a pilot hole for the saw blade just inside the circle, and then carefully cut along the line using the jig or sabre saw. Use a fine-toothed wood cutting blade so the cutout edges are smooth, and favor the inside edge of the line when cutting so the cutout isn't too large. Take your time and try to make the cutout as close to a perfect circle as you can. Drill 3/16 inch diameter holes at the four points marked on the two diagonal lines. Use a jig or sabre saw to carefully cut just to the outside of the larger circle marked on the spacer. There is very little clearance around the sides of the speaker frame so it is necessary to cut the spacer to precisely match the diameter of the speaker frame. Here's what the spacer should look like when you're done drilling and cutting:
After you've verified the fit of the spacer you should paint it with flat black paint so it blends with the speaker panel. The completed spacer should look like this when placed in position on the speaker mounting studs on the speaker panel:
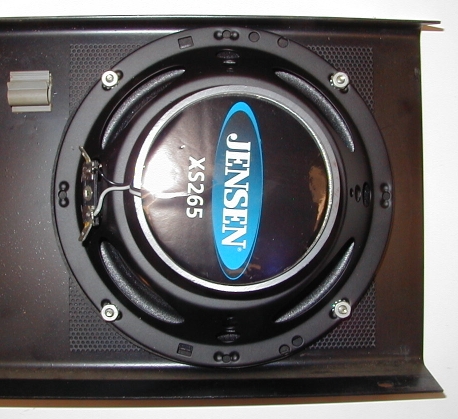
Assemble the Speaker PanelPlace a spacer in position over each set of speaker mounting studs. When you mount the replacement speakers the terminal lugs should be positioned facing each other (i.e., position the lugs facing toward the center of the speaker panel). The right speaker should have a green ground wire fastened under the upper mounting stud closest to the edge of the metal panel. Here's a picture of the left speaker in position:
Don't use excessive force when tightening the replacement speaker mounting nuts. If the speaker has mounting lugs that extend from the sides of the speaker basket be sure to put some spacers (#6 flat washers work fine) between the lugs and the spacer or speaker panel; this way you won't distort the speaker basket when tightening the speaker mounting nuts. Nylon washers are easier to use as they're not magnetic and won't be attracted to the speaker magnet; metal washers work fine but require a bit of patience to install. We're done with the speaker panel for now; we'll wire it up after we're done with the cabinet speaker.
NEXT: how to replace the cabinet speaker HOME: WPC speaker replacement
Copyright © 2005 by Joseph A. Dziedzic. All rights reserved. |