


|
|
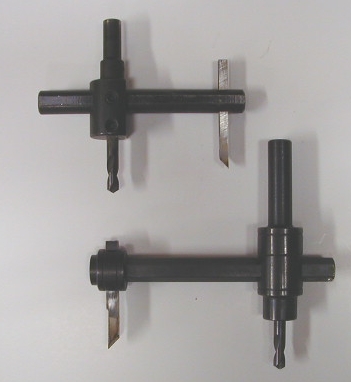
Tools and Supplies NeededSome basic hand and power tools will be sufficient to do a good job; if you have access to specialized power tools such as a drill press and table saw you can do a neater job with less effort. This list of supplies covers everything needed when replacing both cabinet and back box speakers. A few items may not be necessary for your particular game. The list of supplies is also available in a shopping list form for easy reference. ToolsMost of these tools are available at well-stocked hardware centers or via online sellers. Circle CuttersIf you have access to a drill press a circle cutter is a great way to cut a perfect circular cutout in wood. If you don't have access to a drill press you can use a jig or sabre saw instead; in that case you'll need a compass so you can draw the appropriate sized circles that you'll cut out with the saw. I'd recommend two different circle cutters made by General Tools: model 5B (~$20) for 1 - 6 inch diameter holes, and model 55 (~$30) for 1-3/4 - 7-7/8 inch diameter holes. Model 5B can be used to enlarge the display panel speaker mounting hole and fabricate adapter blocks or spacers for the back box or cabinet speakers; model 55 can be used to fabricate a mounting block or spacer for the cabinet speaker. Here's a picture of the two models (5B on top, 55 on bottom):
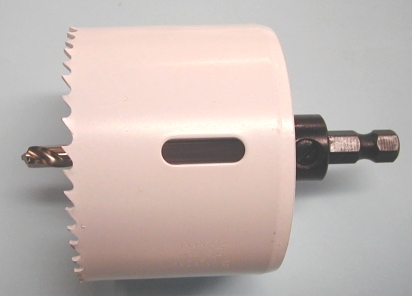
I use two different circle cutters so I don't need to re-adjust them between jobs. Most speakers of a given size range will have similar-sized mounting cutouts. Don't forget to buy an extra cutting blade when you buy the circle cutters. Note: These types of circle cutters produce a lot of dust when used; have a shop vacuum available to suck the dust out of the air. An option for smaller-sized holes (up to about 3 inches) is a hole saw. Hole saws are commonly available in 1/4 inch incremental sizes. The maximum size of a hole saw limits their usefulness, but they can come in handy to cut the 2-3/4 inch diameter hole in an adapter plate used for right side speakers on games with a plastic display panel.
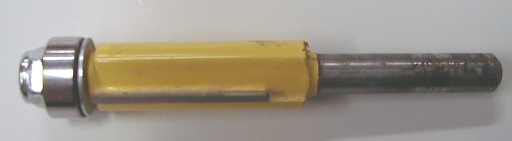
If you have a plunge-cutting router you may wish to check out the Jasper Audio Circle Jig models (available from Parts Express or the manufacturer). The model 200 (part number 365-250) will cut circles ranging from 2-1/4 to 18-3/16 inch diameter; the model 400 (part number 365-255) will cut circles ranging from 1 to 7-1/2 inch diameter. Both models are adjustable in 1/16 inch increments, and will fit many different brands of router. Router with Edge-Trimming BitA router with an edge-trimming bit is used to enlarge the cabinet speaker cutout. The edge-trimming bit should have a roller bearing at the end opposite the shaft that inserts into the router, and should be able to handle material of 1 inch thickness. The bit I use has cutters that are an inch long; here's a representative one from Freund:
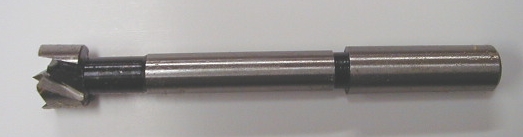
Jig or Sabre SawA jig or sabre saw is used to rough-cut the cabinet and display panel speaker cutouts. You'll need the appropriate wood-cutting blade for the saw; a fine-tooth wood-cutting blade of 14 or more teeth per inch will give the best results. Forstner Drill BitsIf you have access to a drill press Forstner (flat bottom) drill bits do a great job of creating recesses for T-nuts and speaker mounting screws. You can buy a set of six Forstner bits at Home Depot for about $20. Here's a picture of a typical Forstner bit:
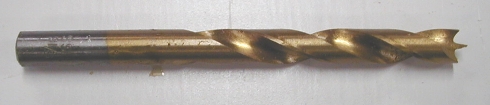
If you don't have access to a drill press you can use a flat bottom router bit to make the recesses. Brad Point Drill BitsBrad point drill bits have a "spike" in the center that allows you to position the bit very precisely. They are only used for drilling in wood or wood composite materials. You'll need 3/16, 7/32, and 1/4 inch diameter bits.
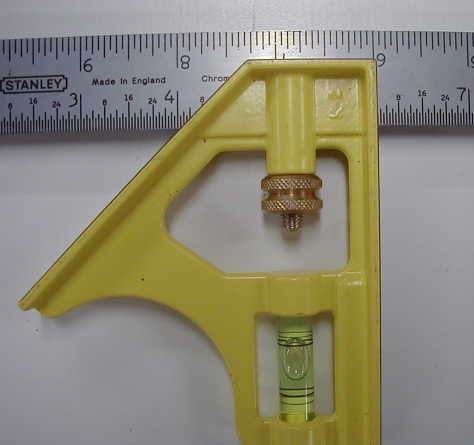
Combination SquareA combination square is used to mark layout lines on the display panel; here's a typical one made by Stanley Tool Works:
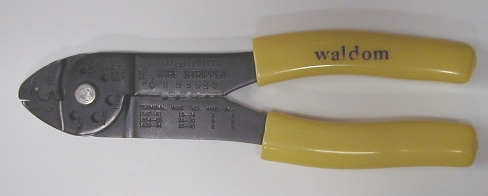
Molex Terminal Crimping ToolA Molex W-HT-1921 hand crimp tool can be used to crimp the 0.093 inch and 0.156 inch terminals (crimp pins) used in the connectors; see Ed at Great Plains Electronics. Here's a picture of the tool:
Miscellaneous Hand ToolsYou'll need wire cutters and strippers, Phillips and regular screwdrivers, a 5/16 inch nut driver, drill motor and drill bits, etc. ConsumablesThese are items you'll probably buy on an infrequent basis. 3M 467MP High Performance Adhesive3M's 467MP high performance adhesive is great for re-attaching the screened plastic panel to the surface of a wooden display panel. You can purchase a 2- or 3-inch wide roll from HSC Electronic Supply. Flat Black PaintYou'll need flat black paint for any bare wood surfaces on the display panel, or adapters or spacers that you fabricate; bare wood will be visible through the metal speaker grille. Electronic Components, Hardware, and Miscellaneous SuppliesThese are items that you will purchase for each installation. Note: This list of items is available in an abbreviated shopping list form. WireYou'll need 18-gauge stranded wire to hook up the new sound system. The actual length needed will vary depending on control placement; see the section on speaker wiring for specifics. I use four different colors of wire in the wiring harnesses that I construct; that makes it very easy to ensure connections are made to the correct terminals. Your local auto parts store is a good source for 18-gauge stranded wire: a 25-foot length will cost you less than $5. Radio Shack also sells 18-gauge stranded wire, although their color choices are somewhat limited. You can order wire in larger quantities - typically 100-foot spools - if you're planning to upgrade several machines. Alpha 1555 is a good choice; Mouser Electronics sells 100-foot spools for about $15 per spool. Belden and other name brands are fine too. Note: You can use 20-gauge wire if that's all that is available; the slight increase in resistance compared to 18-gauge wire is not that significant for this application. Cable TiesYou'll need about fifty 4-inch nylon cable ties to build the new speaker wiring harness and fasten it to the existing cabinet wiring harnesses. A 7-inch nylon cable tie is used to fasten the cabinet wiring harness to its mounting block on the rear of the cable access opening in the bottom of the back box (you'll cut the original cable tie when you run the new speaker wiring harness inside the split corrugated tube containing the existing cabinet wiring harnesses). You can buy these at electrical supply houses or at Home Depot. Heat Shrink TubingThis is used to insulate connections to the L-pad or rheostat terminals. The exact size will vary based on the size of the terminals on the control that you use, but in general 3/16 inch inside diameter should be appropriate. You'll need less than six inches of heat shrink tubing, but it's handy stuff to have around for insulating wire splices. Molex 0.093 Inch KK Series In-line Wire ConnectorsI like to use in-line wire connectors when building the new speaker wiring harness and connecting the various components. While the connectors aren't strictly necessary, they allow you to do a neater job, and also make it easier to disassemble components when necessary for service or replacement. These parts are available from Mouser Electronics or Great Plains Electronics. Quantities and the Molex part numbers are shown below: Back Box Speaker Disconnect
Level Control Disconnect
Molex 0.156 Inch KK Series Wire-to-Board ConnectorsThese connectors are used where the speaker wiring harness connects to the output of the sound board in the back box. Quantities and the Molex part numbers are shown below: Sound Card Output
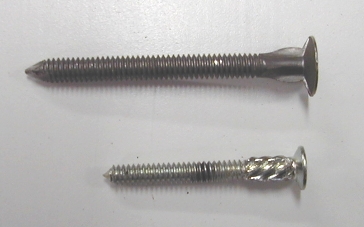
Female Quick Connect TerminalsYou'll need four to six crimp on 1/4 inch female quick connect terminals sized to fit 18-gauge wire for connections to the speaker and sub-woofer crossover. You can also use 1/4 inch and 3/16 inch female quick connect terminals for the back box speaker connections, or you can solder wires directly to the speaker terminals. L-Pad or RheostatAs discussed in the "Crossovers and Level Controls" section, you'll need either an L-pad or a rheostat to control the level of the back box speakers. 8 ohm 50 watt L-pads are available from Parts Express; look for part number 260-252. These run about $5 each, and are what I'd recommend. If you need a 4 ohm L-pad you can use a dual-section ("stereo") 8 ohm L-pad and simply wire the two sections in parallel (terminal 1 of front section to terminal 1 of rear section, etc.). Rheostats are available from Mouser Electronics and other suppliers; look for Ohmite models RHS8R0 (8 ohm, 25 watt) or RHS10R (10 ohm, 25 watt), or Vishay model MP10A10 (10 ohm, 25 watt). These run at least $20 each, and in my opinion don't have any benefits that would make them preferable to the less-expensive L-pad. CrossoverIf you replace the cabinet speaker with a woofer you'll need a crossover (see the section on crossovers and level controls for more details). The Pyramid model CR-19 is an inexpensive subwoofer crossover that works well with 4 ohm woofers. You can find these via a Google search of the web for "pyramid cr19 crossover". If you can't find one, you can substitute a Mobile Authority HSX-1 subwoofer crossover. You can also use a Parts Express in-line crossover; use part number 266-100 for a 4 ohm woofer, and 266-110 for an 8 ohm woofer. Medium Density Fiberboard (MDF board)If you've chosen to use a larger woofer for the cabinet speaker you'll need to fabricate a new mounting block out of 1/2 inch thick Medium Density Fiberboard (commonly known as MDF board). You'll also need 1/2 inch thick MDF board if you have a game with a plastic display panel and you choose to use a 3-1/2 replacement speaker for the right display panel speaker. If you choose to use an adapter plate to mount a larger woofer to the original cabinet speaker mounting block you'll need 3/4 inch thick MDF board. You can use 1/4 or 3/8 inch thick MDF board to fabricate spacers for the back box speakers if they are needed. Speaker ScrewsSpeaker screws are a special form of flat-head machine screw; they are used to mount speakers to wooden panels without requiring access to the other side of the panel. The existing mounting block for the cabinet speaker has four speaker screws, but they will probably not be long enough to mount a large woofer. Depending on the replacement cabinet speaker you select you may have to find some longer screws.
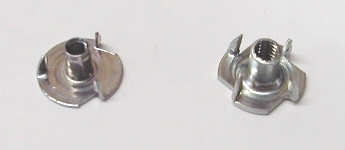
The original speaker screws (at bottom of photo) are #6-32 x 1-1/4 inch; I use #8-32 x 1-3/4 inch speaker screws (at top of photo) because the rim of the speaker frame on replacement woofers is usually quite a bit thicker than the rim of the original cabinet speaker. Speaker screws are hard to find: only specialized fastener suppliers stock them. I found some through a surplus fastener wholesaler, but had to buy a minimum number of 100 via a local supplier. You'll also need flat washers and nylon lock nuts for the size speaker screw that you use. Note: I've located a source for #8-32 x 1-3/4 inch speaker screws that are great for installing replacement woofers with thick frames. Unfortunately, the distributor does not sell small quantities. I'm looking into ways to make these available through pinball parts sellers. T-NutsIf you can't find speaker screws of the correct size and length you can use T-nuts and machine screws instead. Use #8-32 T-nuts with #8-32 machine screws, #8 flat washers, and #8 lock washers to mount any speaker larger than 3-1/2 inches; #6-32 hardware is sufficient for the smaller sizes.
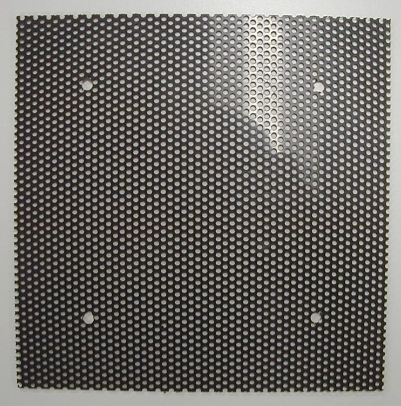
The T-nut on the left is a #6-32, while the one on the right is a #8-32. There are two different styles commonly available, having either 3 or 4 prongs. The 3-prong variety seems to be made for lighter duty use than the 4-prong variety (it's made of a thinner gauge steel). Williams seemed to use the 3-prong variety exclusively. Perforated Plastic Speaker GrilleIf you've chosen to use a larger woofer for the cabinet speaker you'll need to replace the existing perforated plastic speaker grille with a larger piece. The exact specs on the material are:
The perforated plastic used in the game is a black color (probably styrene plastic), but all that I've found available commercially is a dark gray PVC plastic. It's hard to find this available in anything less than a 48 x 48 inch cut sheet.
I've heard that Radio Shack sells plastic speaker grille material, but I haven't had any luck finding it at my local store. Note: I've located a source for dark gray perforated plastic with a hole pattern identical to the original. The color is slightly different from the original, but it's hardly noticeable. Unfortunately, the distributor does not sell single units. I'm looking into ways to make this available through pinball parts sellers. Plastic PC Board SpacersYou may wish to use some short plastic PC board spacers to raise the crossover a slight distance above the cabinet bottom panel. You can use Williams part number 03-8022-1 or Keystone model 8837 spacers.
NEXT: preparing for installation HOME: WPC speaker replacement
Copyright © 2005 by Joseph A. Dziedzic. All rights reserved. |